Sequence table
The columns, statuses, right-click menu, and column settings of the sequence table.
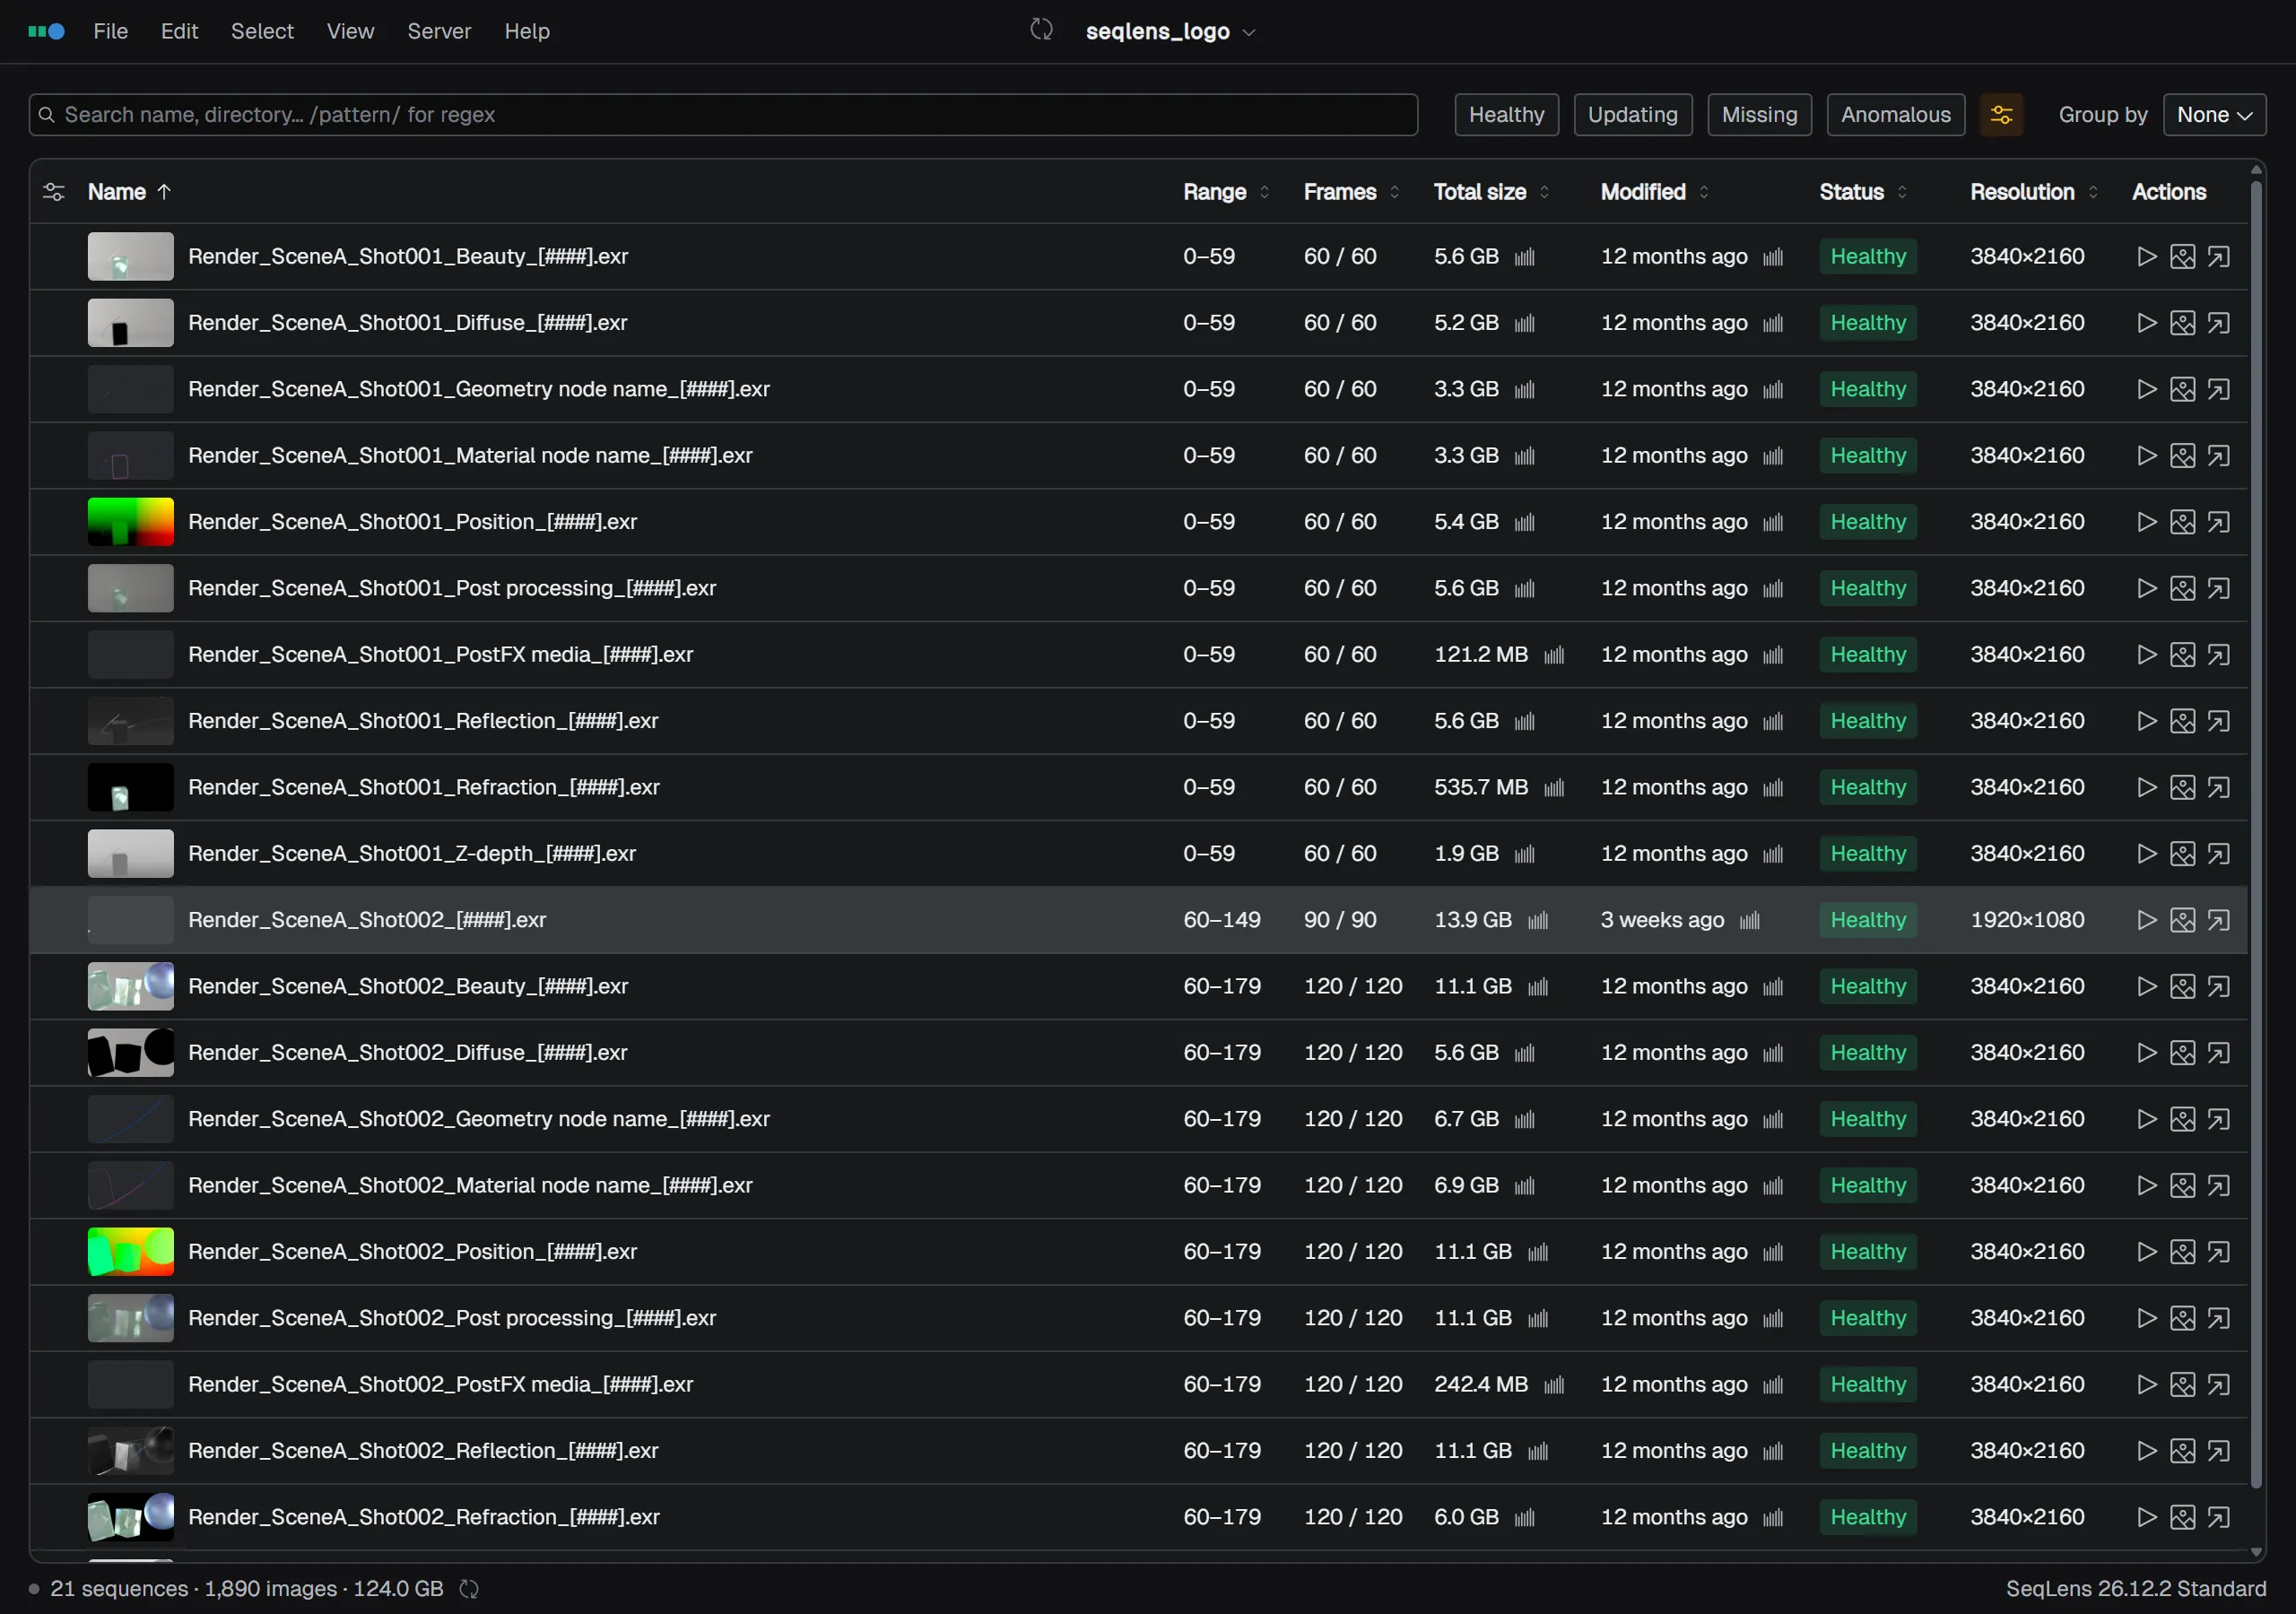
The sequence table lists the sequences found by the scan. Each row corresponds to one sequence and is shown in the form baseName[####].extension.
For files that contain multiple layers, such as EXR files, press the MULTI badge at the end of the name cell to expand the layer rows. Layer rows can be selected separately from the parent sequence and inspected individually in Lens.
Click a column header to switch between ascending and descending sort order. The sort order is saved. By default, the table is sorted by the Name column in ascending order. With a row selected, press Enter to open the first frame in the default app.
Built-in columns
The columns shown by default are as follows (Name is always shown and pinned).
| Column | Contents |
|---|---|
| Name | Sequence name in baseName[####].extension form |
| Range | Frame range (first frame - last frame) |
| Frames | Found frames / expected frames |
| Total size | Total byte size (human-readable) |
| Modified | Last modified time (relative display) |
| Status | Status badge |
| Actions | Action buttons at the end of the row |
Other columns such as Directory, First frame, Last frame, Expected frames, Found frames, Missing frame count, and Scanned at are hidden by default and can be enabled from the Configure columns dialog described below.
The Actions column contains three icon buttons: Quick Play, open the first frame, and reveal in Finder / Explorer. To copy, move, trash, delete, export, and run other operations, right-click a row and choose the action from the menu.
Status badges
The Status column shows the sequence state as a badge.
| Badge | Color | Meaning |
|---|---|---|
| Healthy | Green | Frames are present as expected |
| Updating | Blue | The sequence contains recently written frames |
| {count} Missing | Red | Some frames are missing |
| Error | Red | An error occurred during scanning |
| Anomalous | Yellow | Some frames match anomaly detection rules |
Rows other than Healthy show a colored strip along the bottom edge of the row that indicates per-frame state (the frame strip). This lets you see roughly where missing or anomalous frames are in the list.
Row actions
Right-click a row to open a menu for the current selection. From here you can inspect in Lens, Quick Play, reveal in Finder / Explorer, copy, move, delete, export, and perform selection operations.
Right-click a header to Sort ascending / Sort descending by that column. For added columns such as regex capture columns and metadata columns, you can also choose Rename column or Remove column.
Showing and arranging columns
Open the Configure columns dialog from the adjustment icon at the left edge of the header (you can also open it by right-clicking the header row, or from Columns… in the command palette). In addition to toggling built-in columns on and off, you can add frame metadata keypaths (for example, resolution or exif/ExposureTime) as columns. Change the display name with Label (optional).
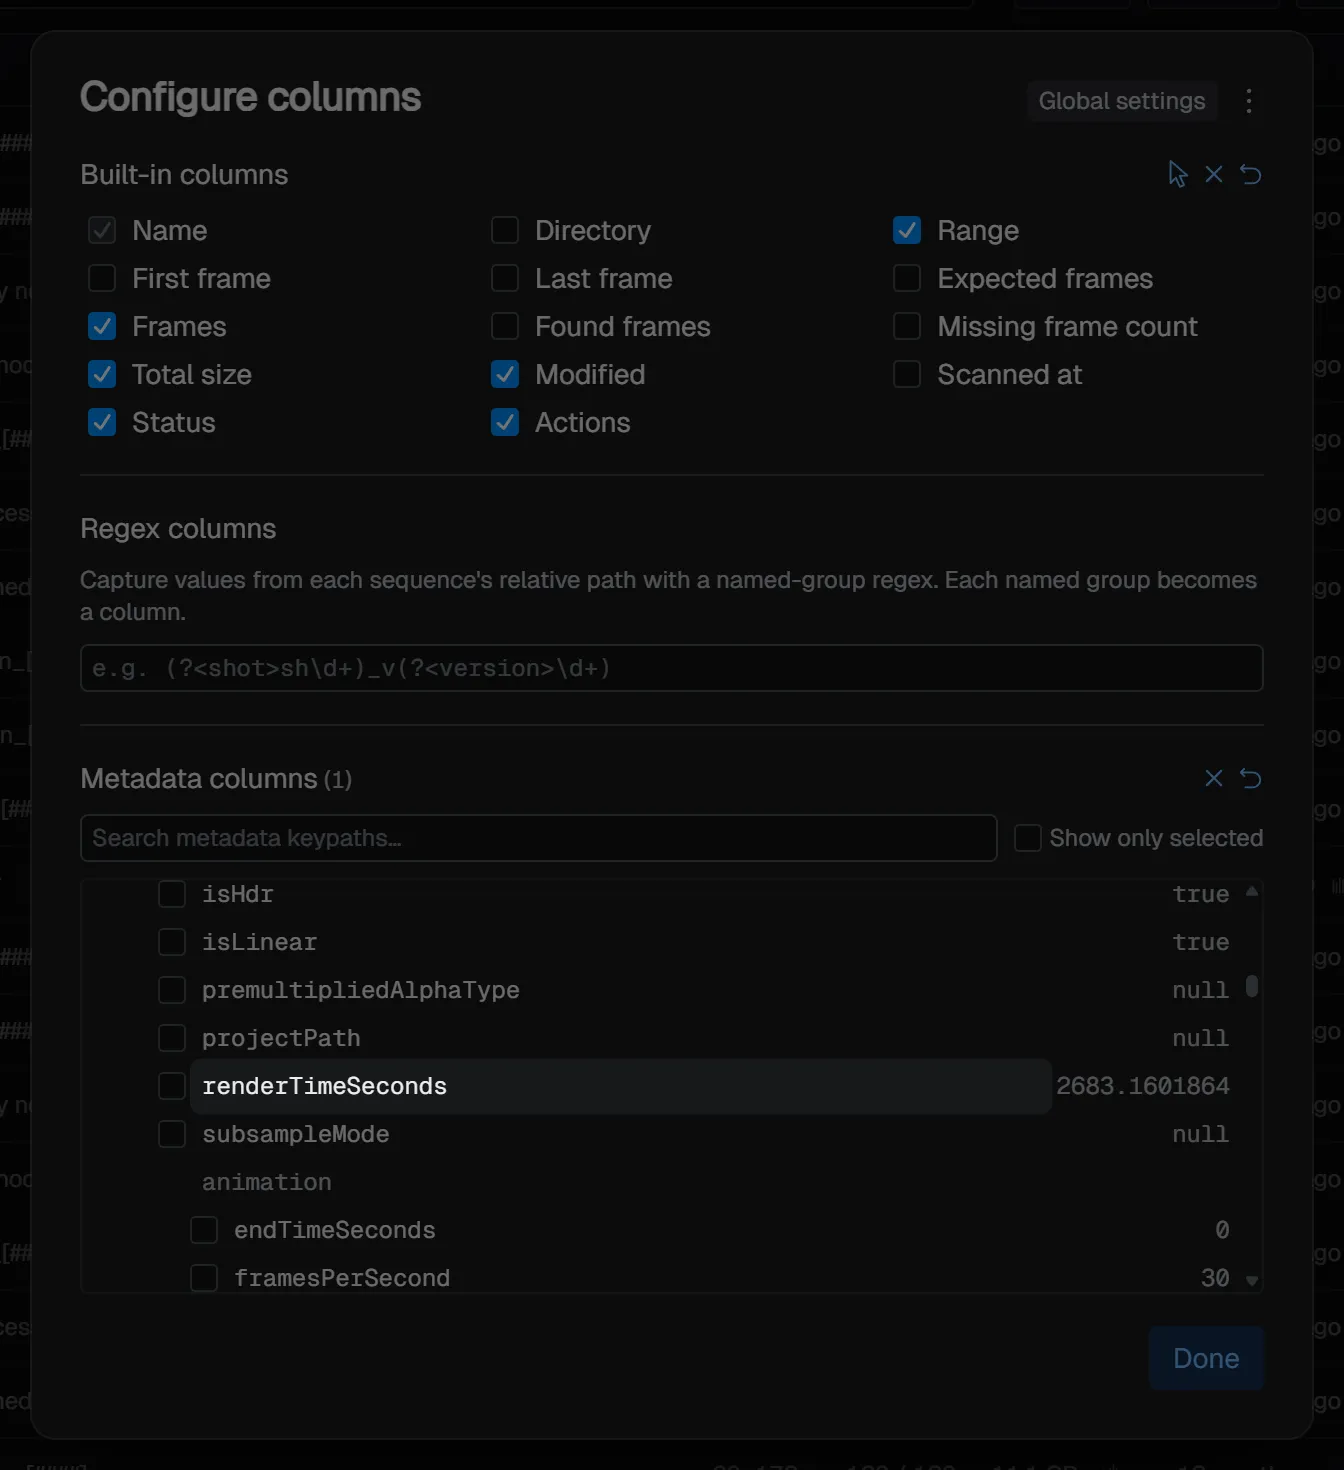
For added columns, the value type (number / date / string / boolean) is detected automatically. This lets sorting and anomaly detection rules handle the values appropriately. By default, one resolution keypath column is added.
From More actions in the upper right of the dialog, you can Restore from global / Save as global, use Save to file… (.seqlensconfig file) and Load from file…, or Reset all column widths.
Resizing columns
Drag the right edge of any column header to change its width. Widths are saved per project, alongside the rest of the column settings.
By default the Name column stretches to fill the remaining space. Drag its edge to pin it to a fixed width; the rest of the row keeps filling the table, and clicking that empty area on the right clears the selection, just like the left edge of a row.
Double-click a column’s right edge to fit the column to its content, so long values are no longer truncated.
To restore widths, right-click a header and choose Reset this column width or Reset all column widths, or use Reset all column widths from More actions in the Configure columns dialog.