File operations
How to copy, move, and delete sequences and frames, and what to check before you do.
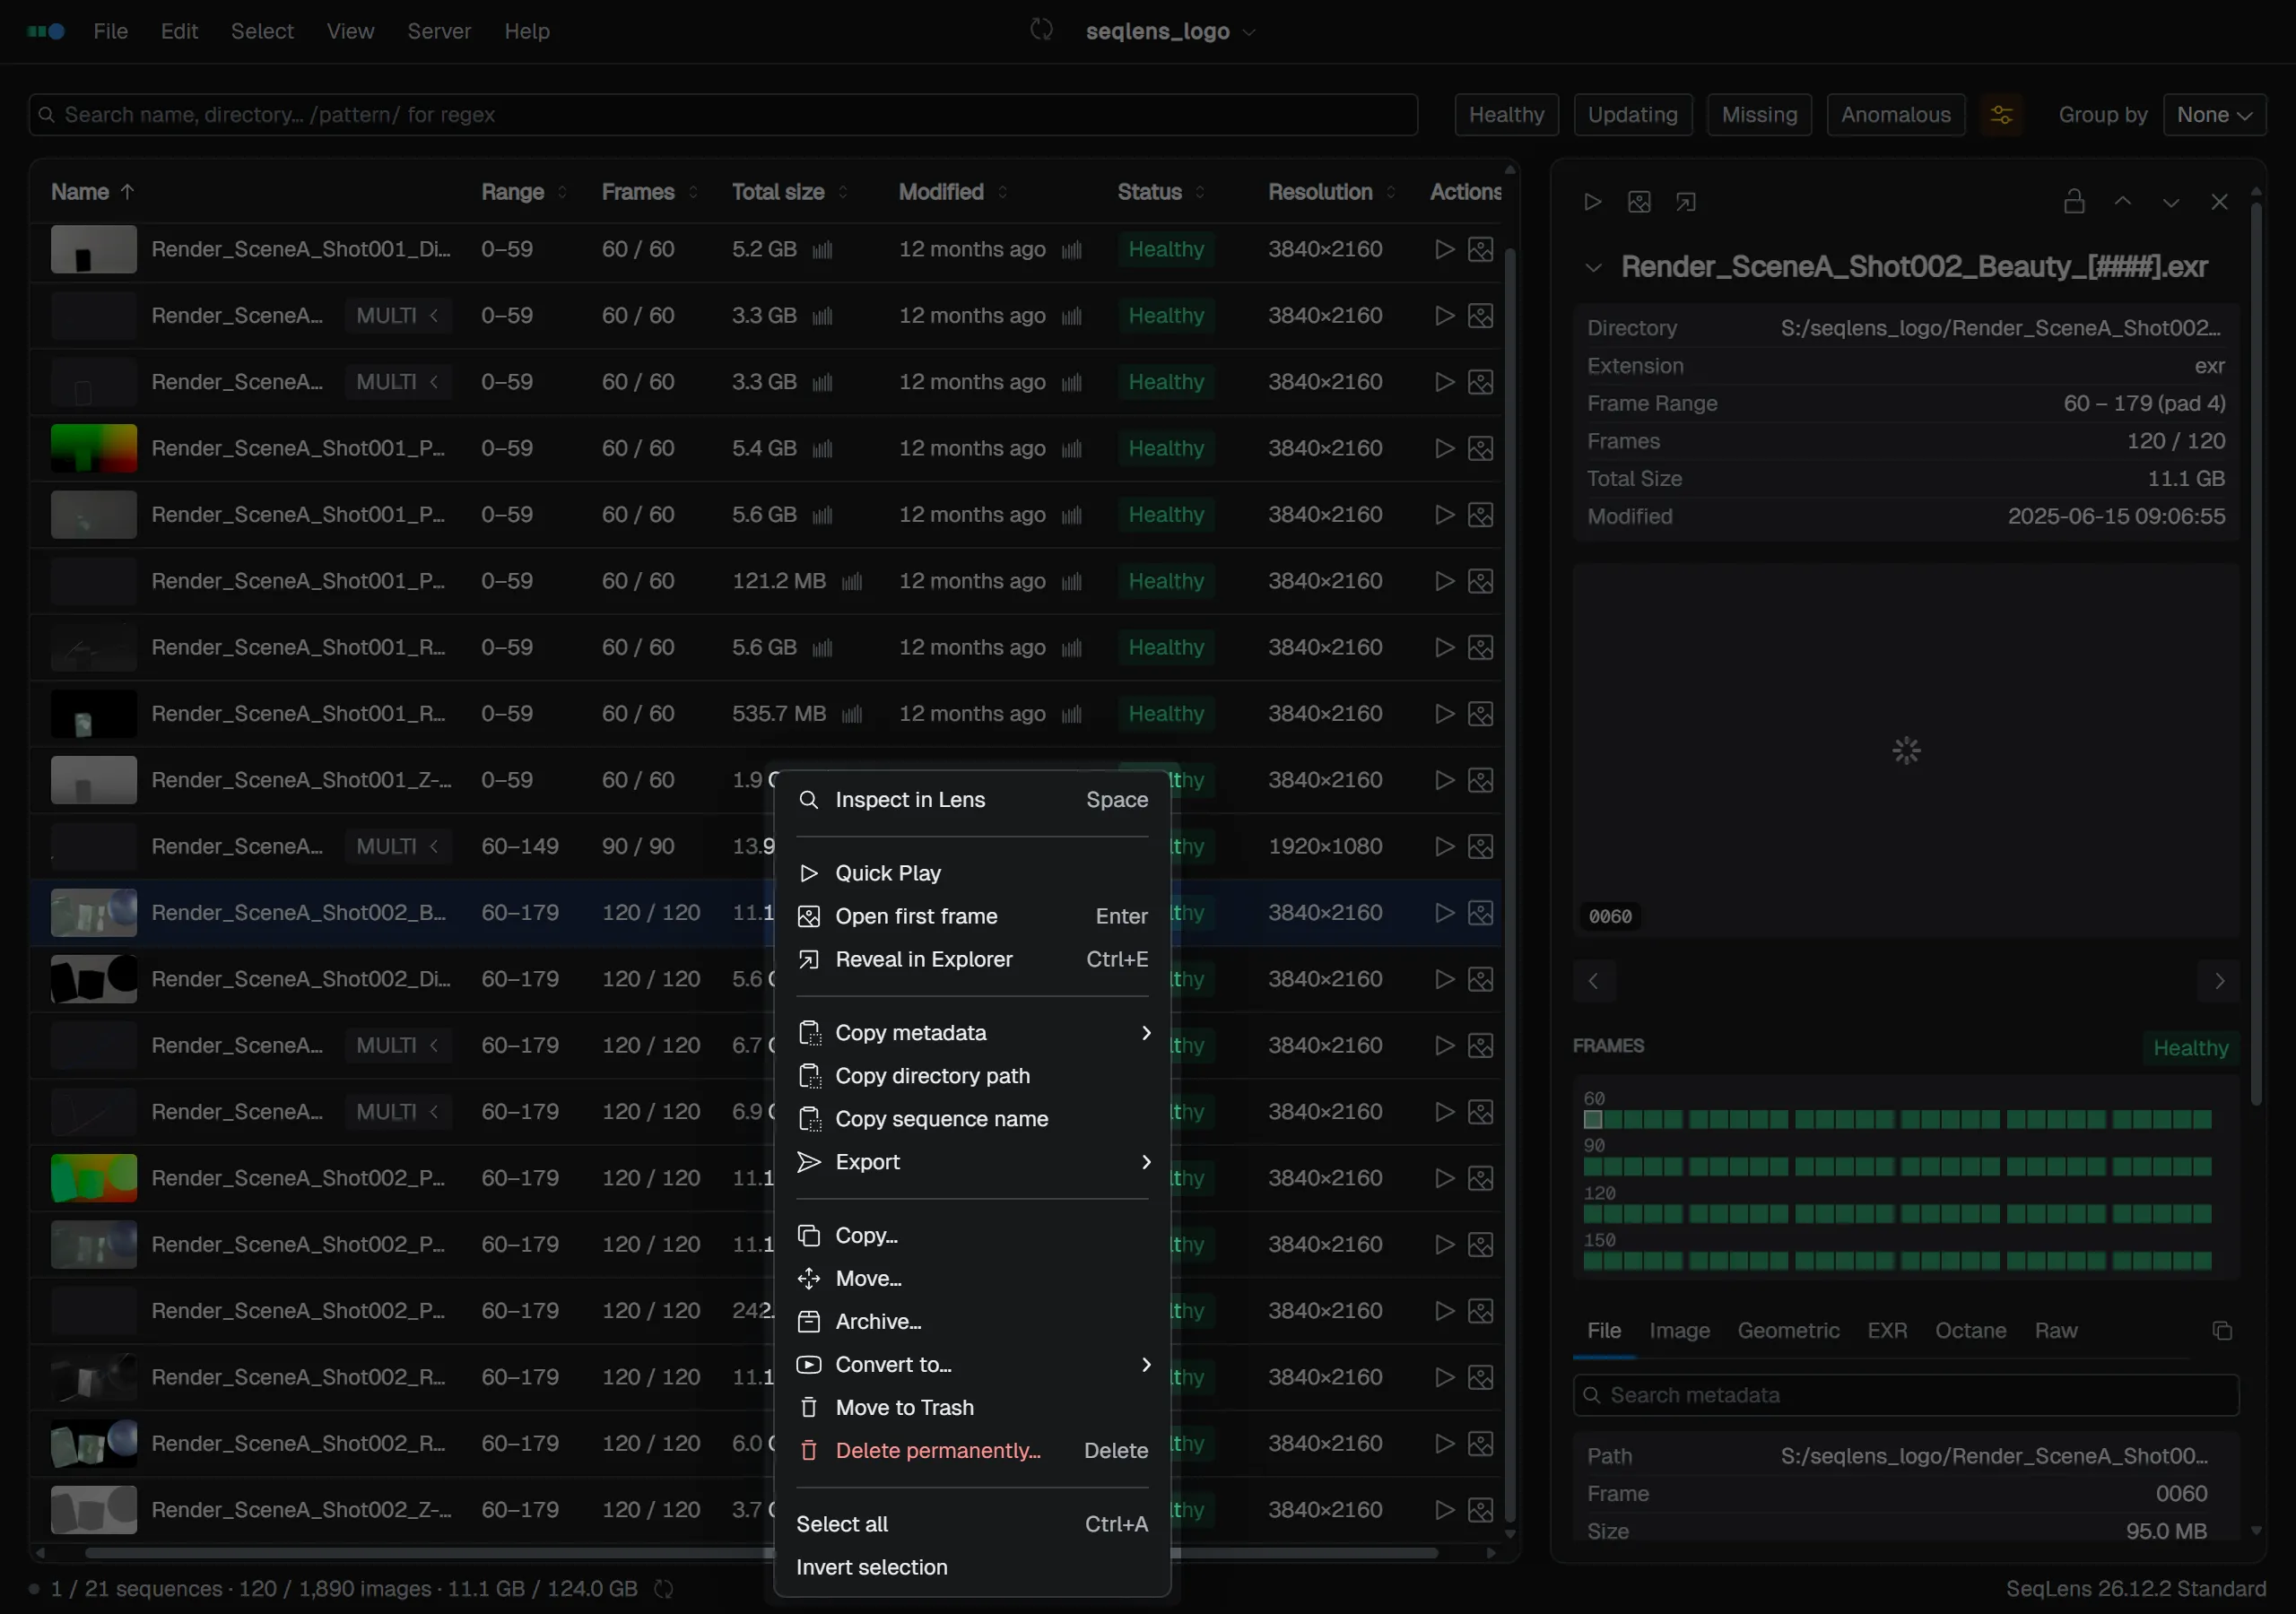
File operations can run on entire sequences selected in the sequence table, or on just the frames you select in the Lens frame grid.
Copy, move, move to Trash, and delete permanently are all available from the row right-click menu or the Edit menu.
When nothing is selected, copy and move act on the entire current filter result. Move to Trash and delete permanently require a selection.
Copy / Move dialog
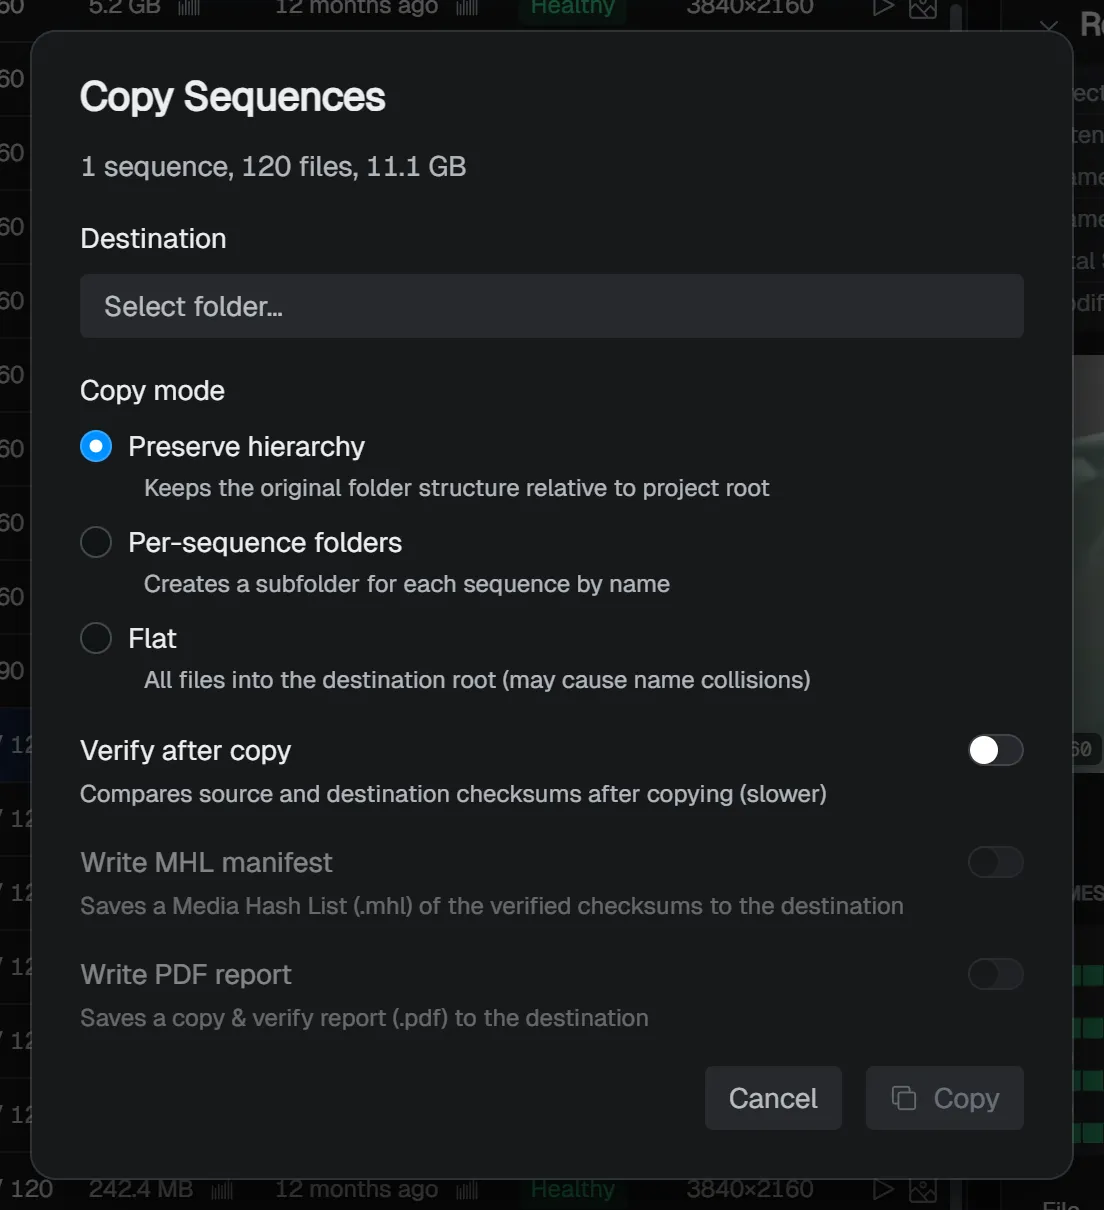
Choosing copy or move opens a dialog where you pick the Destination and how the files are organized. The organization setting is shown as Copy mode when copying and Move mode when moving.
| Mode | Behavior |
|---|---|
| Preserve hierarchy | Recreates the path relative to the project root in the destination |
| Per-sequence folders | Creates a subfolder for each sequence |
| Flat | Places all files directly into a single folder (watch for filename collisions) |
You cannot run the operation when no Destination is set, or when the destination is the same as the original location. Progress appears in the job window, and you can stop it with Cancel.
Copy leaves the original files untouched. Move relocates the files from their original location, so file watching is paused while it runs. While paused, the rescan button turns a warning color, and hovering over the button explains that watching is paused.
The copy dialog has a Verify after copy switch. When it is on, you can also write an MHL manifest or a PDF report in addition to checksum verification. See MHL and copy verification for details.
Resolving conflicts
When a file with the same name already exists in the destination, the choices appear inline within the job in the job window. No separate dialog opens. Pick one of these four:
- Skip — skips just this file and moves on
- Skip all — skips this and all later conflicts
- Overwrite — replaces the existing file in the destination
- Overwrite all — overwrites this and all later conflicts
Move to Trash and delete permanently
Move Selection to Trash moves files to the OS Trash. Because you can restore them from the Trash, this is usually the recommended choice. If files could not be moved to the Trash because it is unavailable (for example, on a network drive), the choices appear inline within that job, and you can pick Skip / Skip all / Delete permanently / Delete all permanently per file.
Delete Selection Permanently… deletes files directly after a confirmation. It does not go through the OS Trash, so the files cannot be restored. Pressing Delete / Backspace with sequences selected also opens this confirmation dialog.
CAUTION
Files that are deleted permanently do not go through the OS Trash and cannot be restored. For important footage, use Move Selection to Trash or always back up before deleting.
Clean up empty folders
Choosing Edit → Clean Up Empty Folders… runs the job right away, with no confirmation, finding and removing empty folders inside the project. Each removed folder is recorded individually in the job log so you can review it afterward. Use it to tidy up empty folders left behind after moving or deleting.
All of these operations run as jobs. You can check progress or cancel them from the status bar or the job window, and overall progress is also shown on the app’s taskbar / dock icon (it turns red if a job fails). See Job window for details.