View and compare frames
Inspect one sequence frame by frame in the Lens, and put two or more sequences side by side to find what differs.
The Lens is the panel that opens to the right of the table. With one sequence selected it shows the details; with two or more it compares them.
Inspecting one sequence
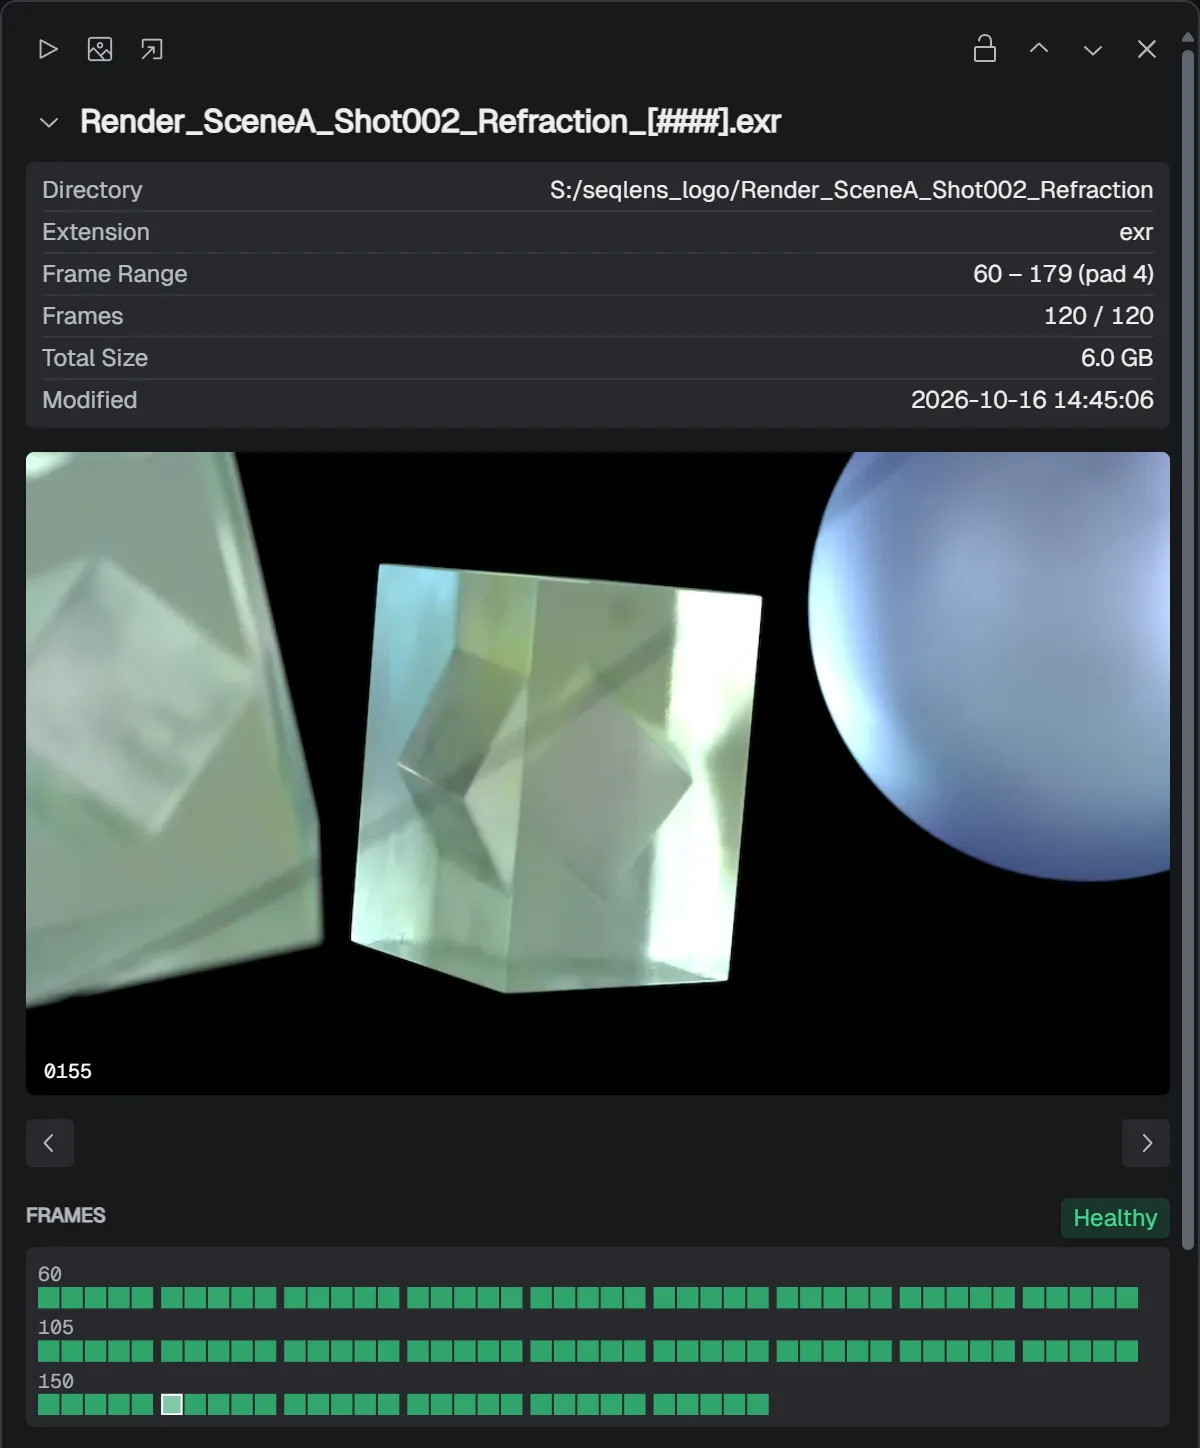
By default, clicking a row in the table opens the Lens. Selecting a row and pressing Space opens it too. Press Space or Esc to close it.
The top of the Lens lists the folder, range, file count, total size, and modified time, followed by the preview and the frame grid. Click a cell in the grid, or press ← →, to change the previewed frame. Page Up / Page Down move to the previous or next sequence.
Right-click the preview to open the frame in its default app, or to copy the image, its full path, or the frame number. Turn on the padlock in the header (Lock to current sequence) and the Lens stays on this sequence while you select other rows. Drag the panel’s left edge to resize it; the width is kept for next time.
If you’d rather have a click only select the row, turn off Auto-open Lens View under Preferences > General.
Checking metadata
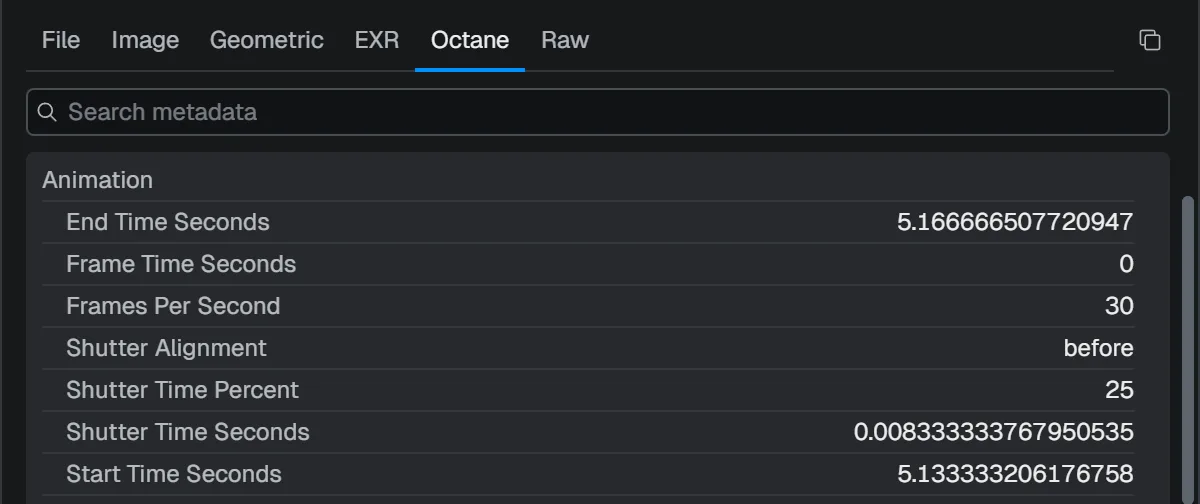
Below the frame grid, the metadata of the frame you’re looking at is split into tabs by category. Along with the EXR header, information that renderers such as Octane write into the file gets its own tab. Narrow keys down with the search box in the tab, and click the copy icon at the right of the tabs (Copy tab as JSON) to copy the contents as JSON.
Right-click a row to copy the key or value, or choose Add to columns to turn that value into a table column. Values you want to compare across the whole shot, such as exposure or render time, are worth adding as columns so you can sort by them or use them in anomaly detection.
Comparing two sequences
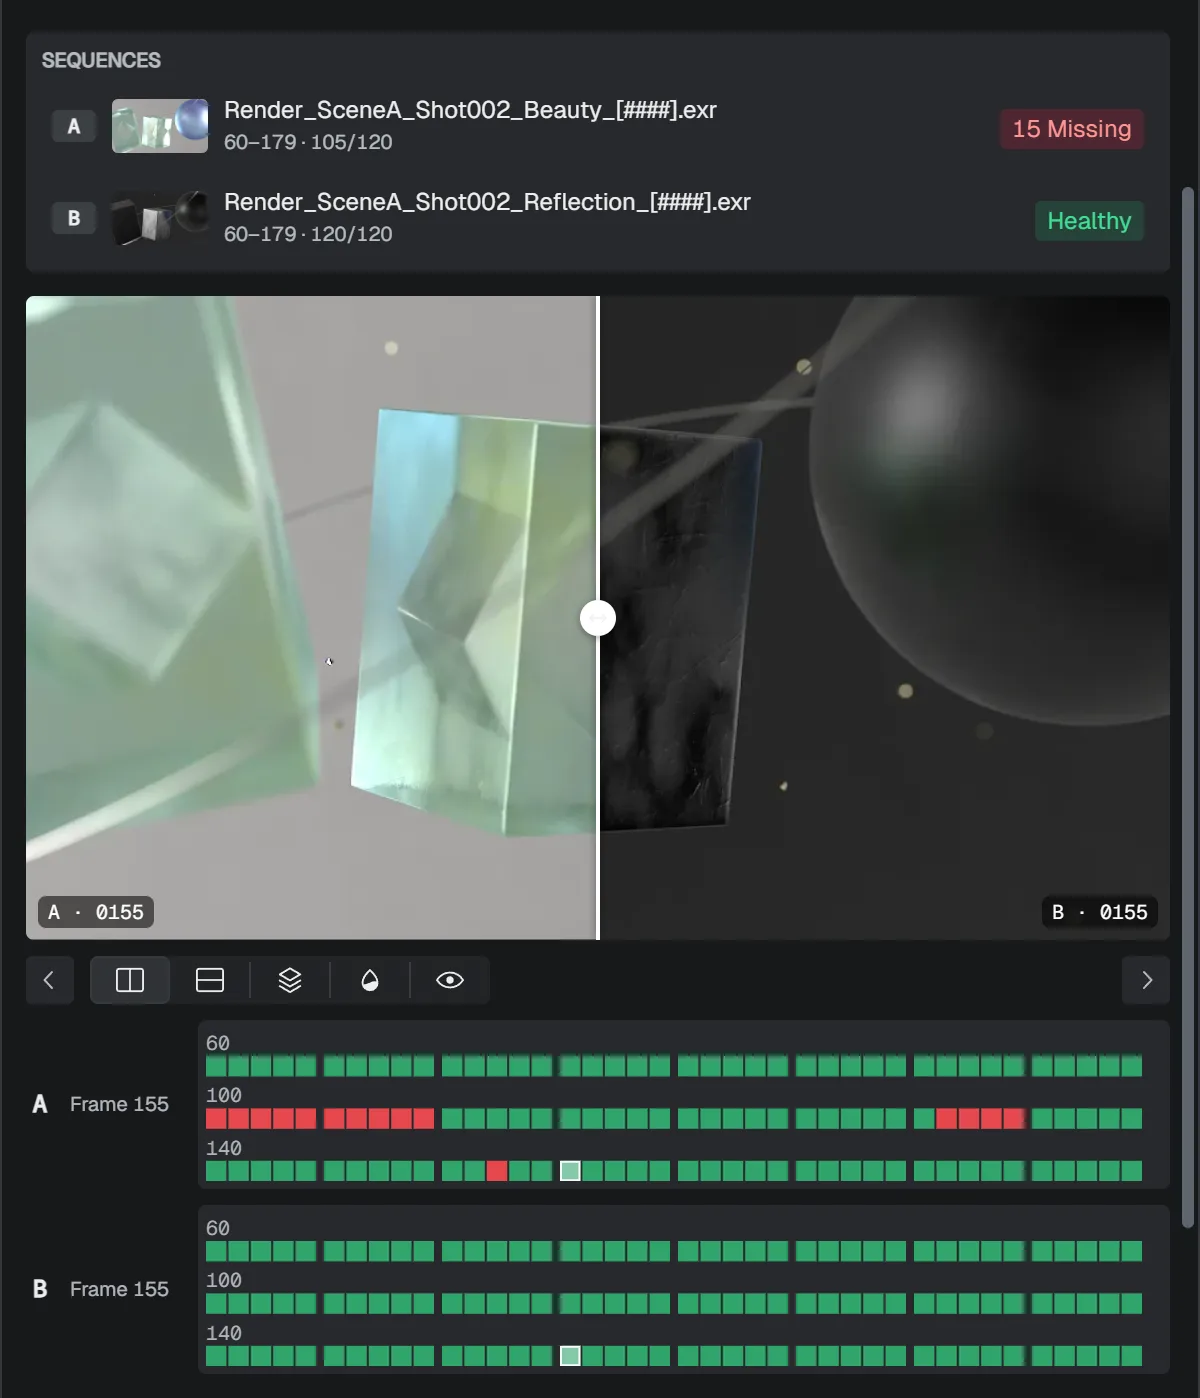
Cmd/Ctrl-click two rows and press Space to compare them. It’s the way to check two versions of the same shot, or two layers of the same EXR. The first in the list is A and the second is B.
The buttons under the preview switch how they’re compared.
| Mode | How to use it | Good for |
|---|---|---|
| Vertical wipe | Drag across the preview left and right | A on the left, B on the right |
| Horizontal wipe | Drag up and down | A on top, B below |
| Onion skin | Drag left and right to change the mix | Spotting offsets with the two overlaid |
| Pixel diff | Nothing to drag | Seeing only the pixels that differ |
| Flip | Press and hold the preview | Showing B for as long as you hold |
The A and B frame grids work independently, so each side can show a different frame. ← → step both A and B by one frame together.
Comparing three or more
With three or more selected, the preview gives way to a metadata comparison table. Rows whose values differ are highlighted, and Hide identical hides the rows whose values match everywhere. Use it to find settings that changed between versions, or color spaces that differ between layers. The Raw tab compares the raw metadata as a line-by-line diff.
Viewing EXR layers
Rows for EXRs with several layers carry a MULTI tag. Click it to expand a row per layer, then inspect any layer in the Lens or compare layers with each other.
Playing a sequence
Click the play icon in the Lens header (Quick Play) to play the sequence as video. It uses the frame rate from the project settings. Quick Play needs FFmpeg; see Export results for setup.